{% hint style="info" %}
上記のコマンドを使用して、同じワーカーを再デプロイして更新できます(例:設定プロパティの変更)。最後のデプロイがデフォルトでアクティブになります。
{% endhint %}
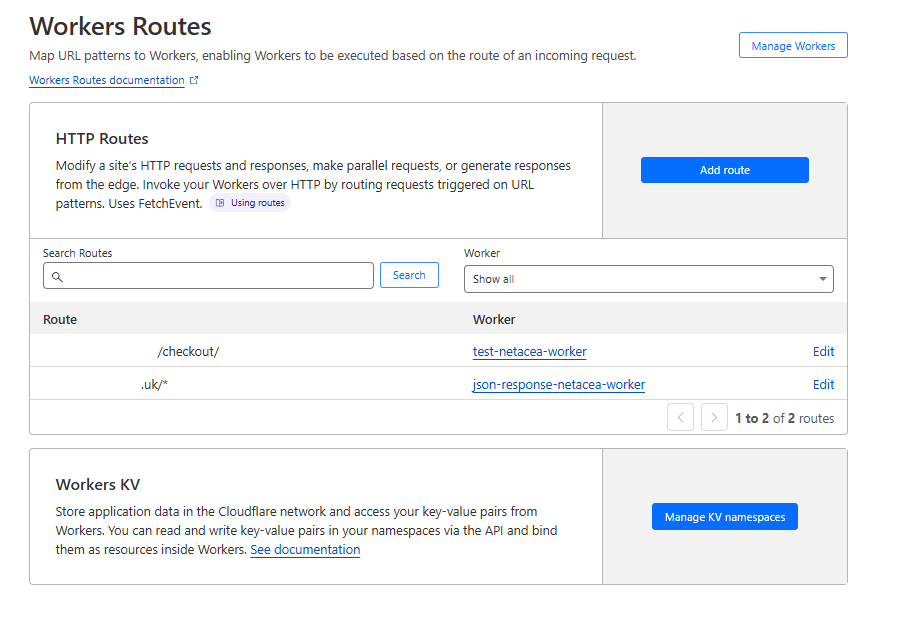
### デプロイの確認
Cloudflareにログインし、ダッシュボードを開き、ワーカーを動作させたいドメインを選択し、最後にメニューから「Workers Routes」を選択します。`wrangler.toml`ファイルのルートに関連付けられた、新しくデプロイされたワーカーが表示されるはずです。
{% hint style="info" %}
**編集**をクリックすることで、wrangler経由でワーカーを再デプロイすることなく、ワーカー、ルート、環境などを変更できます。
{% endhint %}
各ワーカーのデプロイは、ワーカー(例:test-netacea-worker)をクリックし、「Deployment's」タブを選択することで確認できます:
各ワーカーについて、さまざまなメトリクス、関連付けられたルートを確認でき、以前のデプロイにロールバックするオプションがあります。
---
# Agent Instructions: Querying This Documentation
If you need additional information that is not directly available in this page, you can query the documentation dynamically by asking a question.
Perform an HTTP GET request on the current page URL with the `ask` query parameter:
```
GET https://docs.netacea.com/jp/netacea-puraguin/cloudflare/installation-and-configuration/installation-via-wrangler-cli.md?ask=
```
The question should be specific, self-contained, and written in natural language.
The response will contain a direct answer to the question and relevant excerpts and sources from the documentation.
Use this mechanism when the answer is not explicitly present in the current page, you need clarification or additional context, or you want to retrieve related documentation sections.
.png?alt=media)
%20(1)%20(1)%20(1)%20(1)%20(1)%20(1)%20(1)%20(1)%20(1).png?alt=media)
%20(7).png?alt=media)
%20(9).png?alt=media)
.png?alt=media)